Understanding Availability Schedules
Setting up your availability schedules is a crucial step for managing your dog training business efficiently. Availability schedules define when you’re available to conduct different types of training sessions and allow clients to book sessions during these times. In Pawgress, you can create multiple availability schedules to accommodate different training formats.
The Availability Schedules page is where you manage your weekly schedules and exceptions
Creating Your First Availability Schedule
Step 1: Navigate to the Availability Page
From your dashboard, click on “Availability” in the main navigation menu. This will take you to the availability schedules overview page.Step 2: Create a New Schedule
Click the “New Schedule” button in the top right corner of the page. This will take you to the schedule creation form.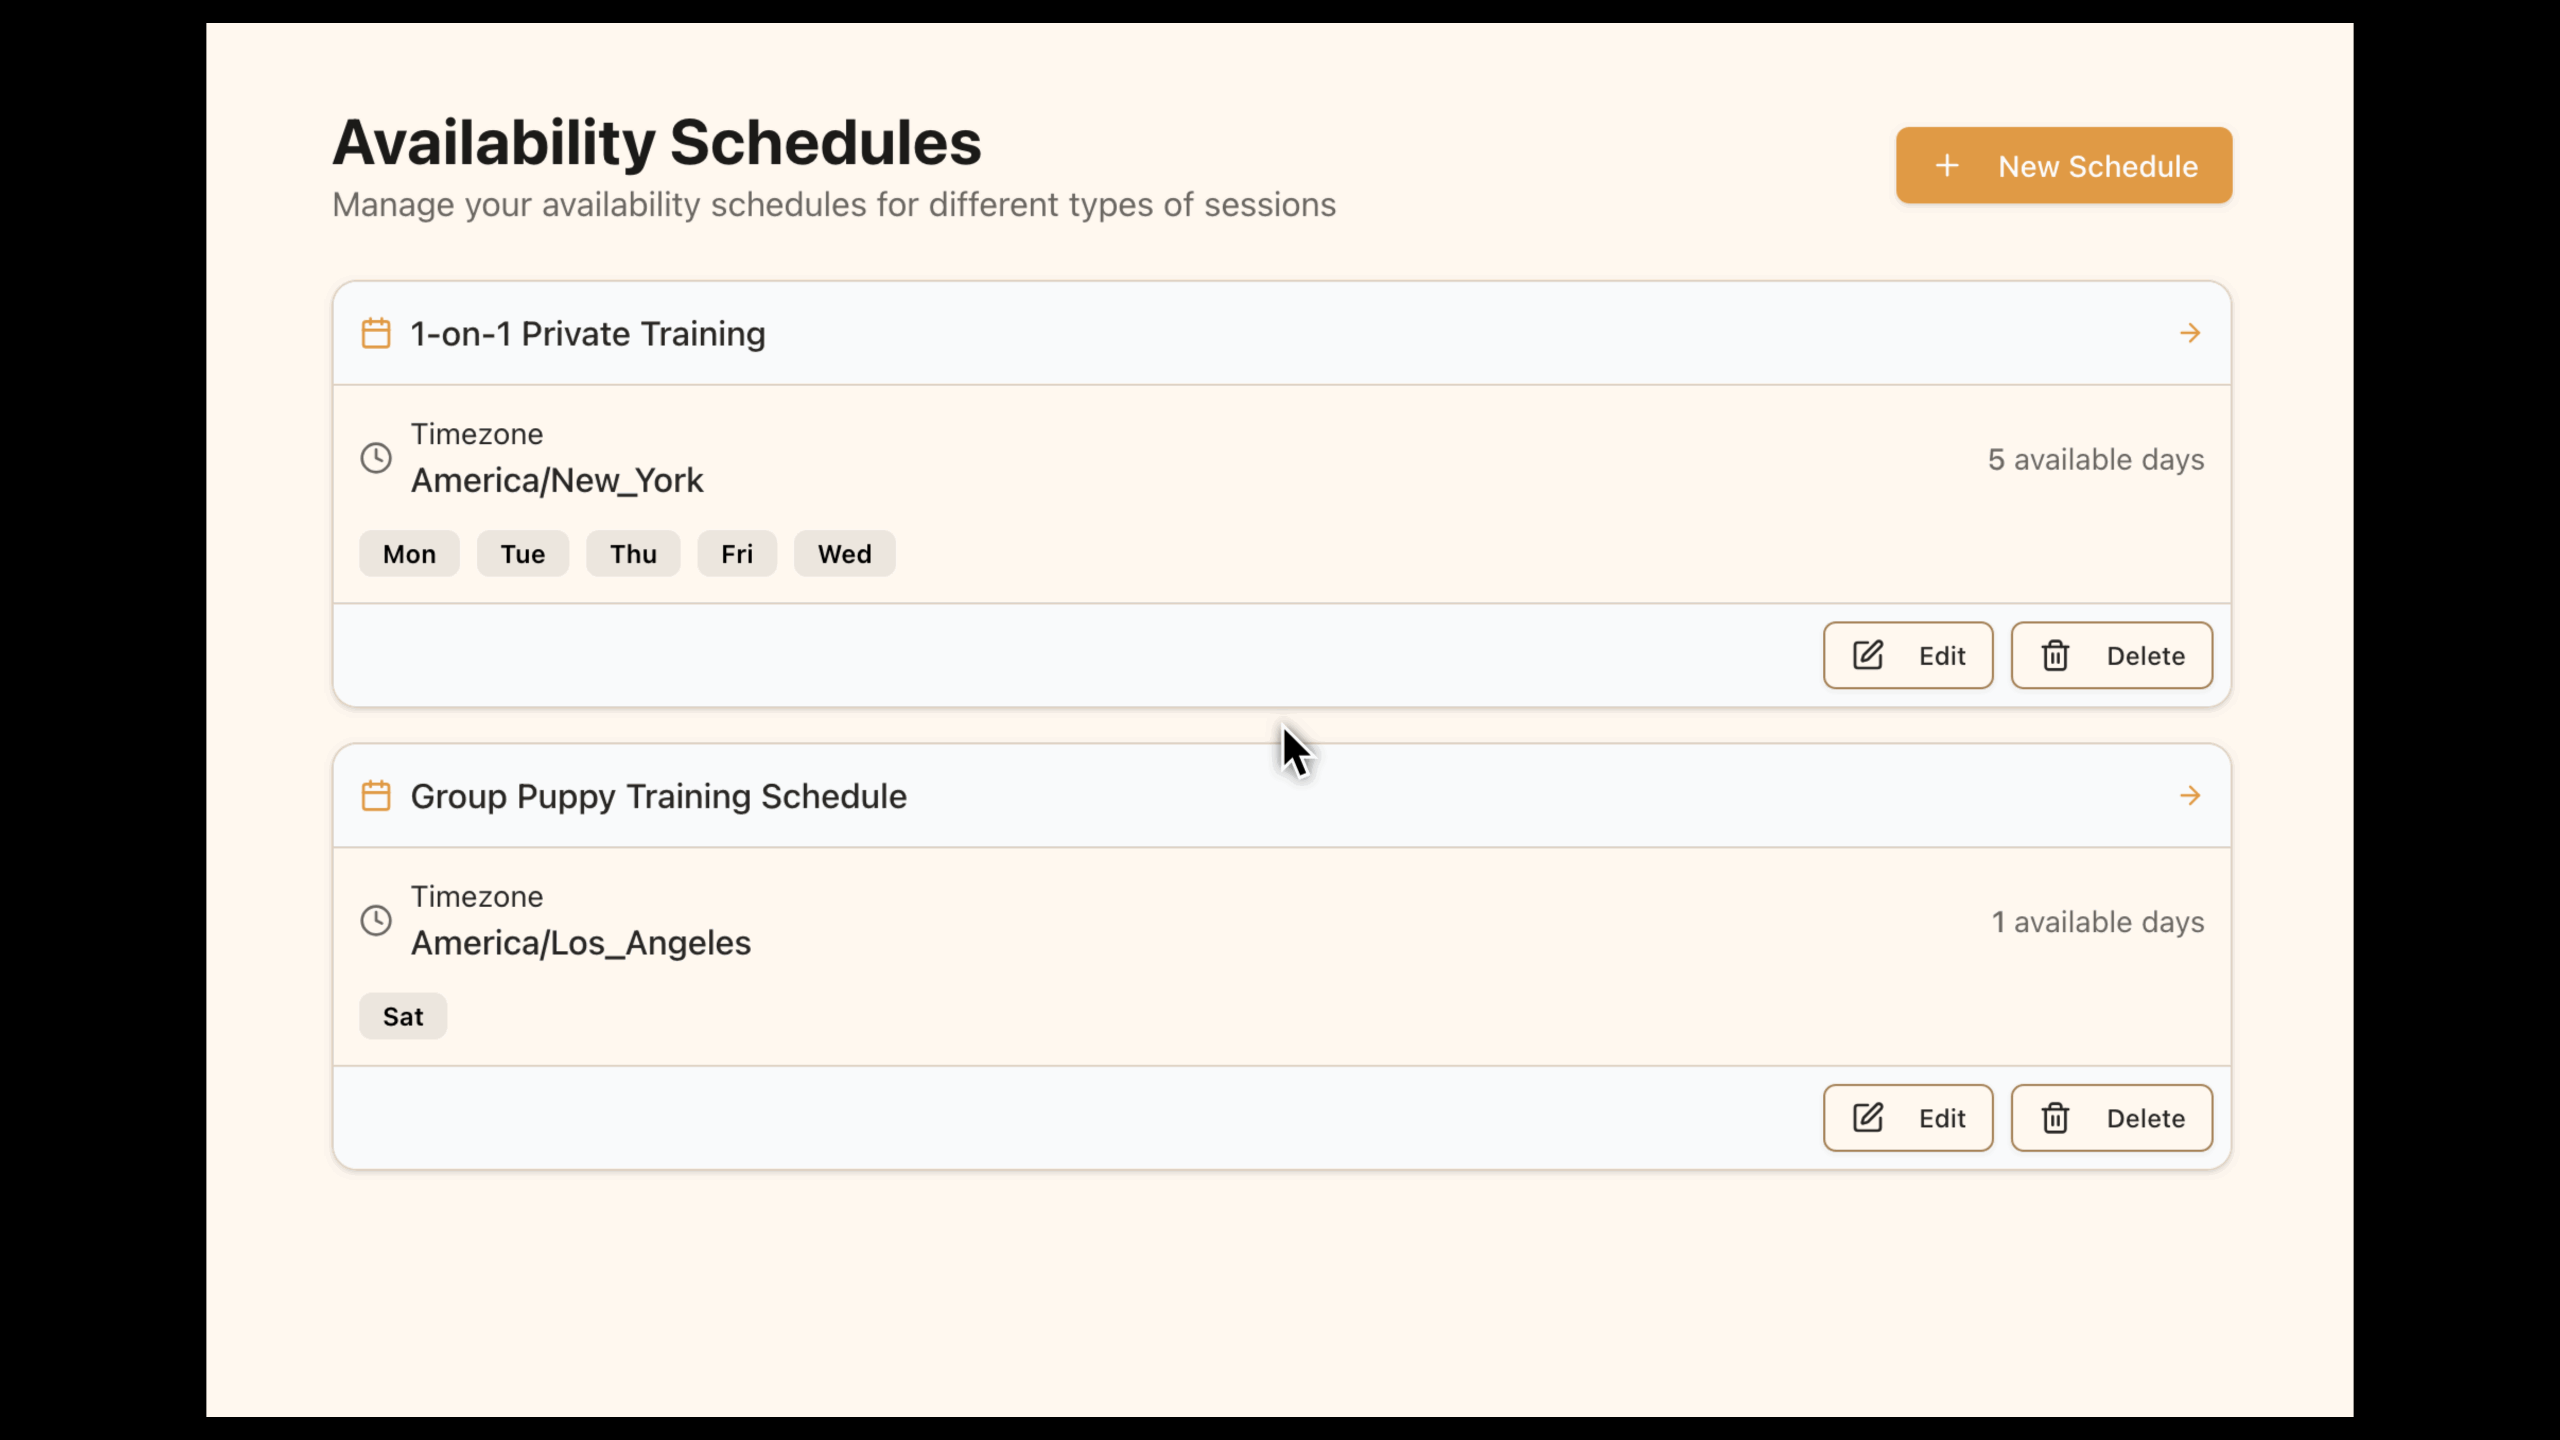
Click the “New Schedule” button to create a new availability schedule
Configuring Basic Information
Schedule Name
First, give your schedule a descriptive name that indicates its purpose:- Specific: Use names like “One-on-One Training Hours” or “Puppy Class Schedule” rather than generic names like “My Schedule”
- Clear: The name should instantly tell you what type of training this schedule is for
- Consistent: Establish a naming convention that works for all your schedules
Timezone Setting
Select the timezone that applies to your schedule. This is especially important if:- You work with clients in different timezones
- You travel regularly and train in different locations
- Your local area observes daylight saving time changes
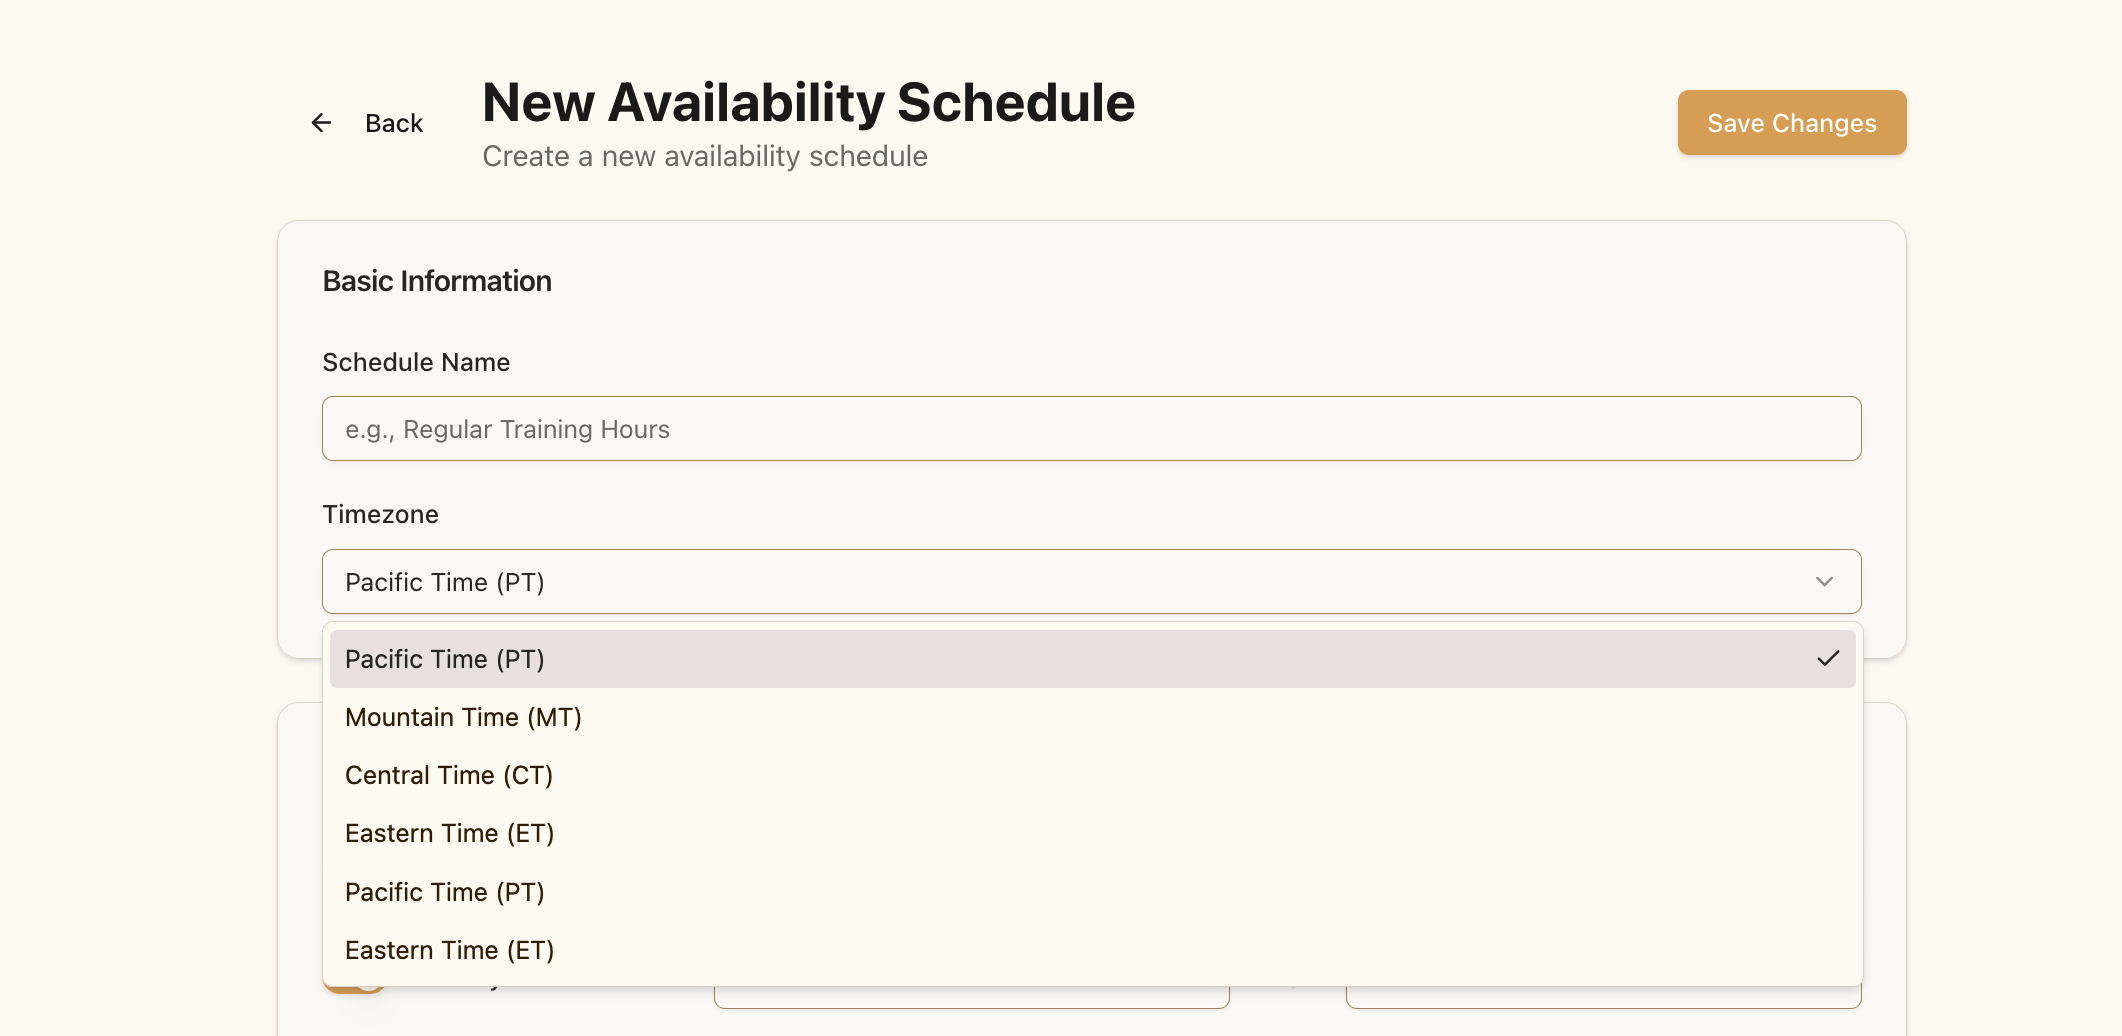
Enter a descriptive name and select your timezone
Setting Weekly Hours
The weekly schedule is the foundation of your availability. For each day of the week, you can:- Mark the day as available or unavailable by toggling the switch
- Set specific start and end times for when you’re available on that day
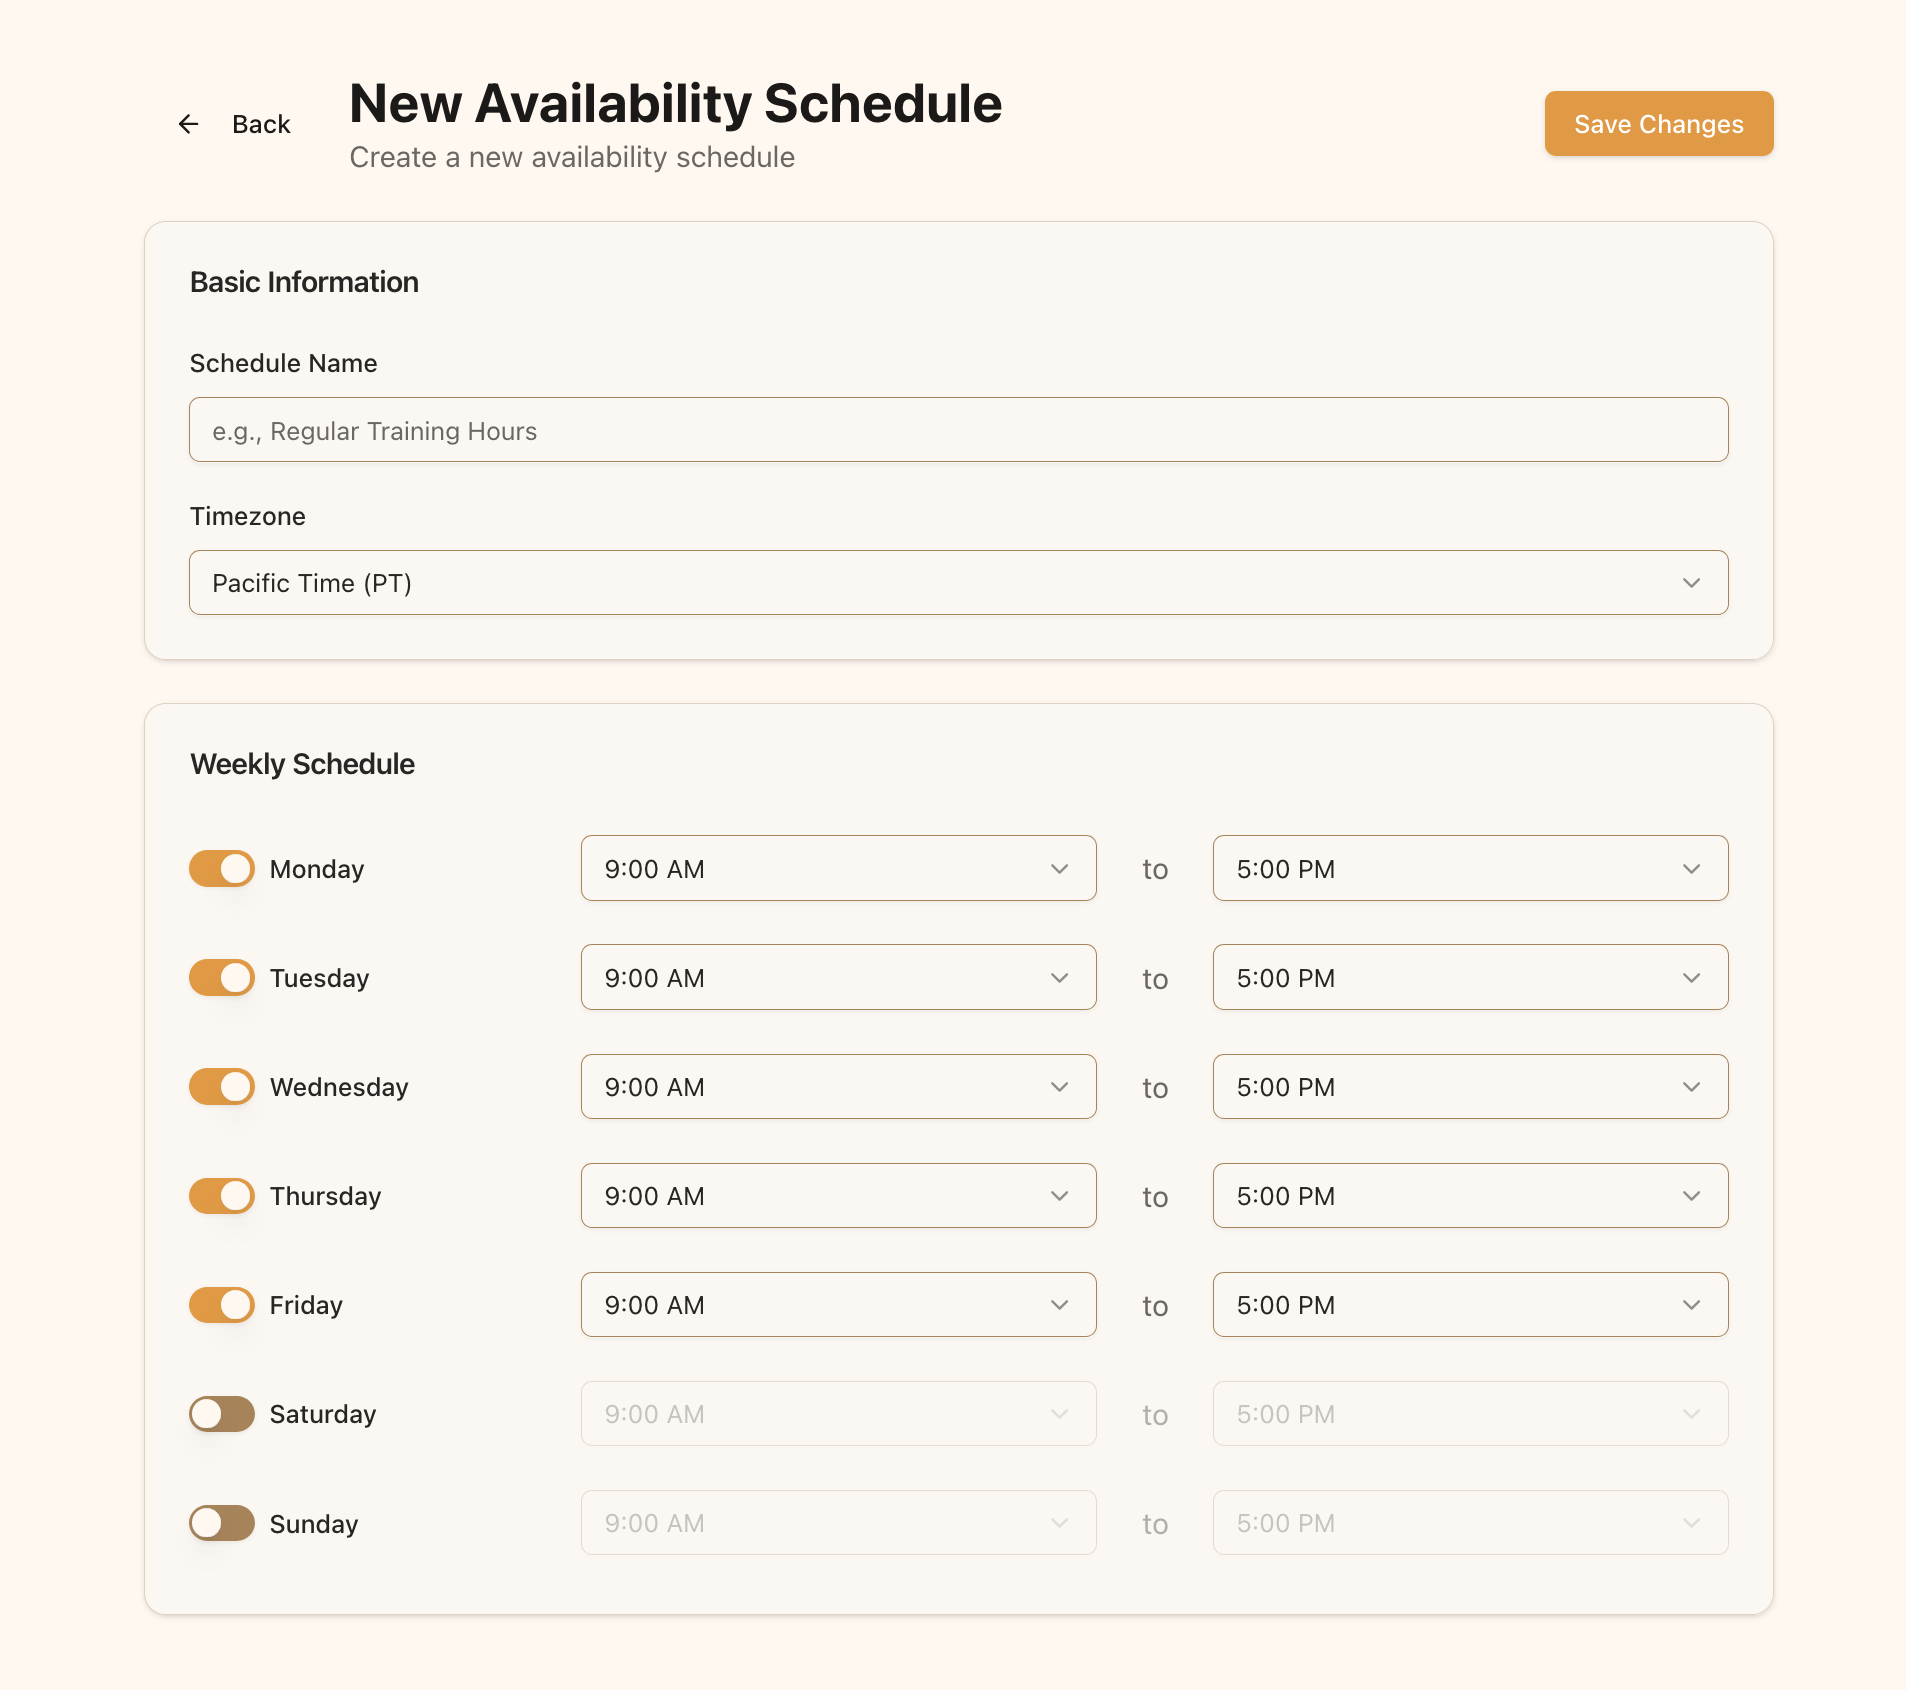
Configure your availability for each day of the week
Daily Availability
For each day, consider these factors when setting your hours:- Buffer Time: Allow for breaks between sessions by setting slightly shorter hours than your actual workday
- Travel Time: If you travel to clients, factor in travel time when setting your availability
- Preparation: Include time for session preparation and follow-up
Saving and Using Your Schedule
Saving the Schedule
Once you’ve configured your weekly availability:- Review all settings to ensure accuracy
- Click the “Save Changes” button at the top right of the page
- Your new schedule will be saved and added to your list of availability schedules
Connecting to Training Packages
After creating your availability schedule, you’ll need to associate it with specific training packages:- Navigate to the Training Packages page
- Create a new package or edit an existing one
- In the package form, select your availability schedule from the dropdown
- Save the package
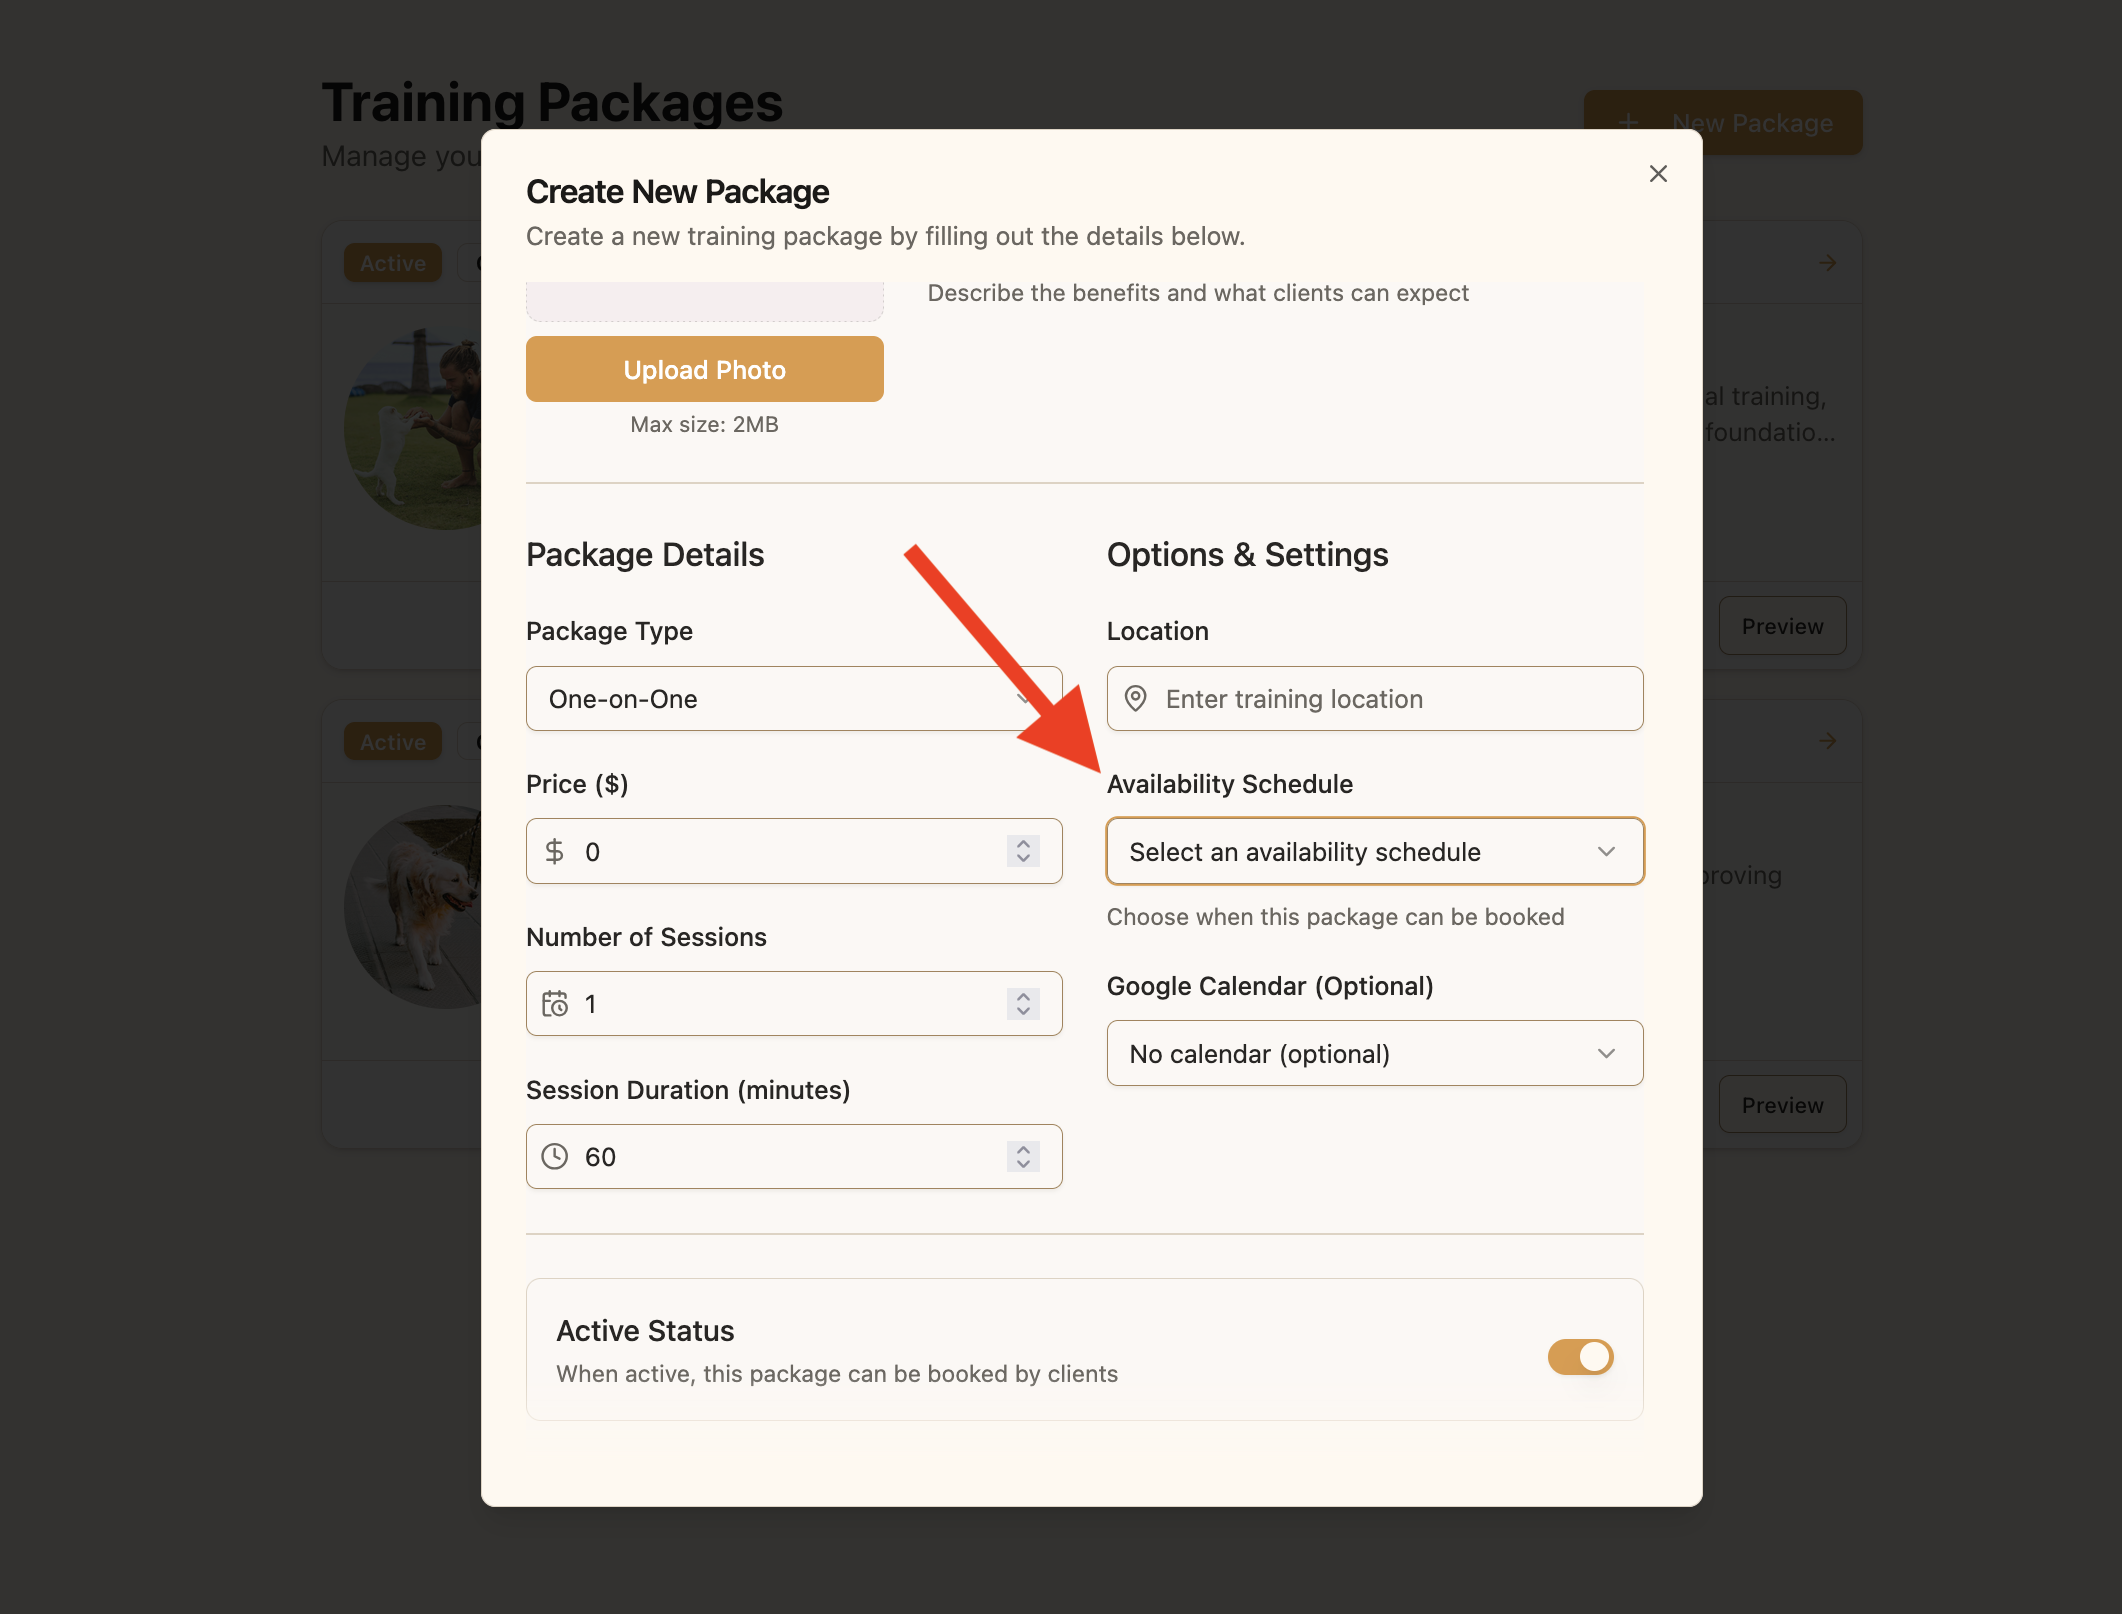
Select your availability schedule when creating or editing a training package
Managing Date Overrides
Your regular weekly schedule is a great starting point, but life happens! Date overrides allow you to specify exceptions to your regular schedule for specific dates.When to Use Overrides
Date overrides are perfect for handling:- Vacations and time off
- Holidays and special events
- Professional development days
- Temporary schedule changes
- Dates when you’re already fully booked
Adding an Override
To set a date override:- Navigate to your availability schedule detail page
- Find the “Date Overrides” section
- Click the “Add Override” button
- In the dialog, select the date(s) you want to override
- Choose “Unavailable for entire day” or specify unavailable hours
- Click “Add Override” to save
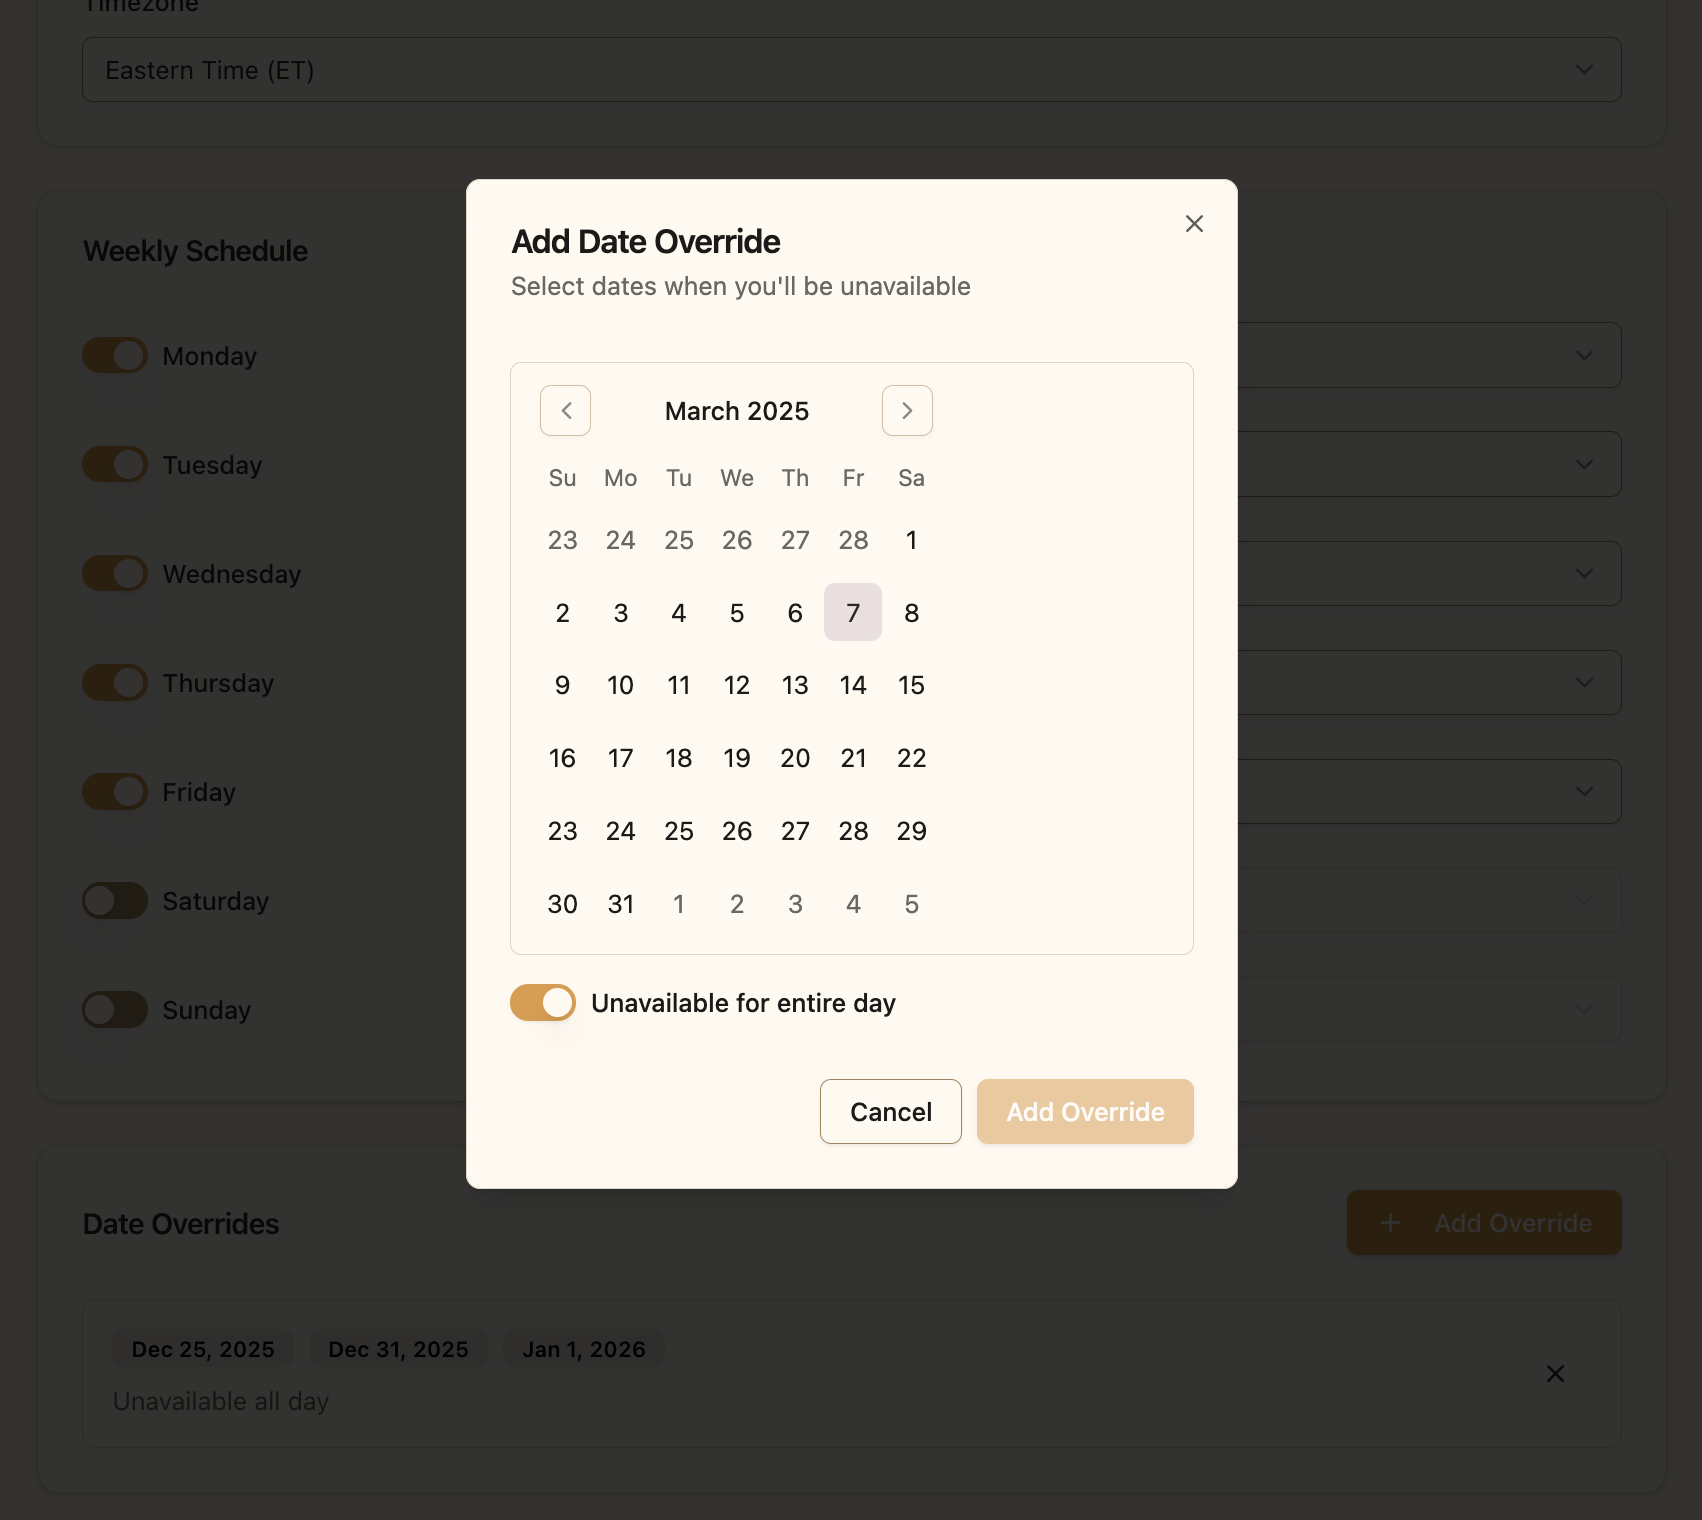
Add date overrides for vacations, holidays, or other special circumstances
Managing Existing Overrides
You can view and manage all your date overrides in the “Date Overrides” section of your availability schedule page:- View all your scheduled overrides
- Delete overrides that are no longer needed
- Add new overrides as your schedule changes
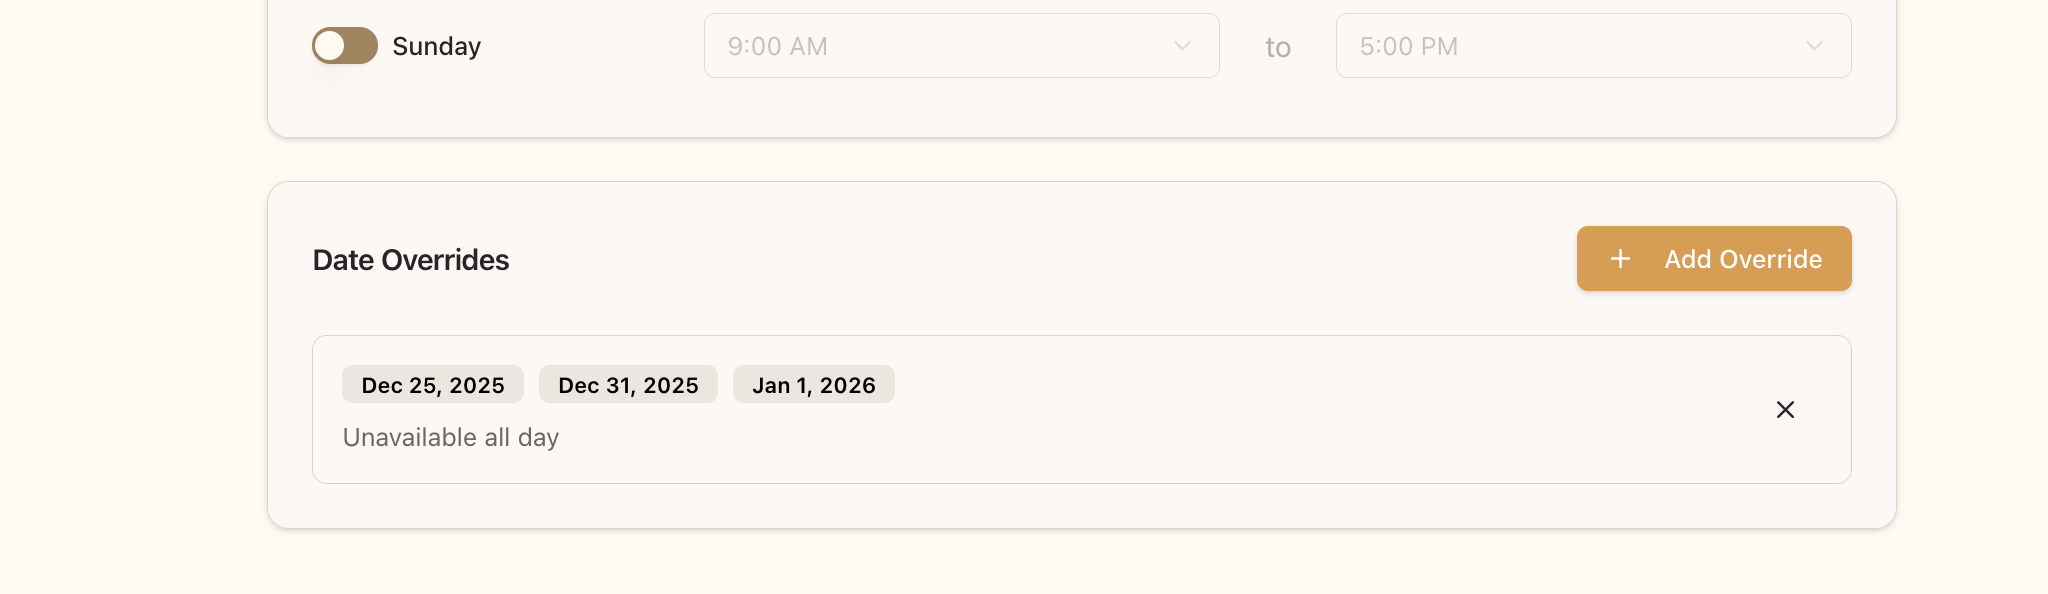
View and manage your date overrides from the availability detail page
Planning AheadSet up overrides well in advance for known time off and holidays. This prevents clients from booking sessions during times you know you’ll be unavailable and saves you from having to reschedule or cancel sessions later.
Next Steps
Now that you’ve set up your availability schedules, you’re ready to:- Create or update training packages connected to your availability schedules
- Schedule sessions during your available times
- Set up Google Calendar integration to sync your Pawgress schedule with your personal calendar